StitchSketchEx User Manual
File Manager
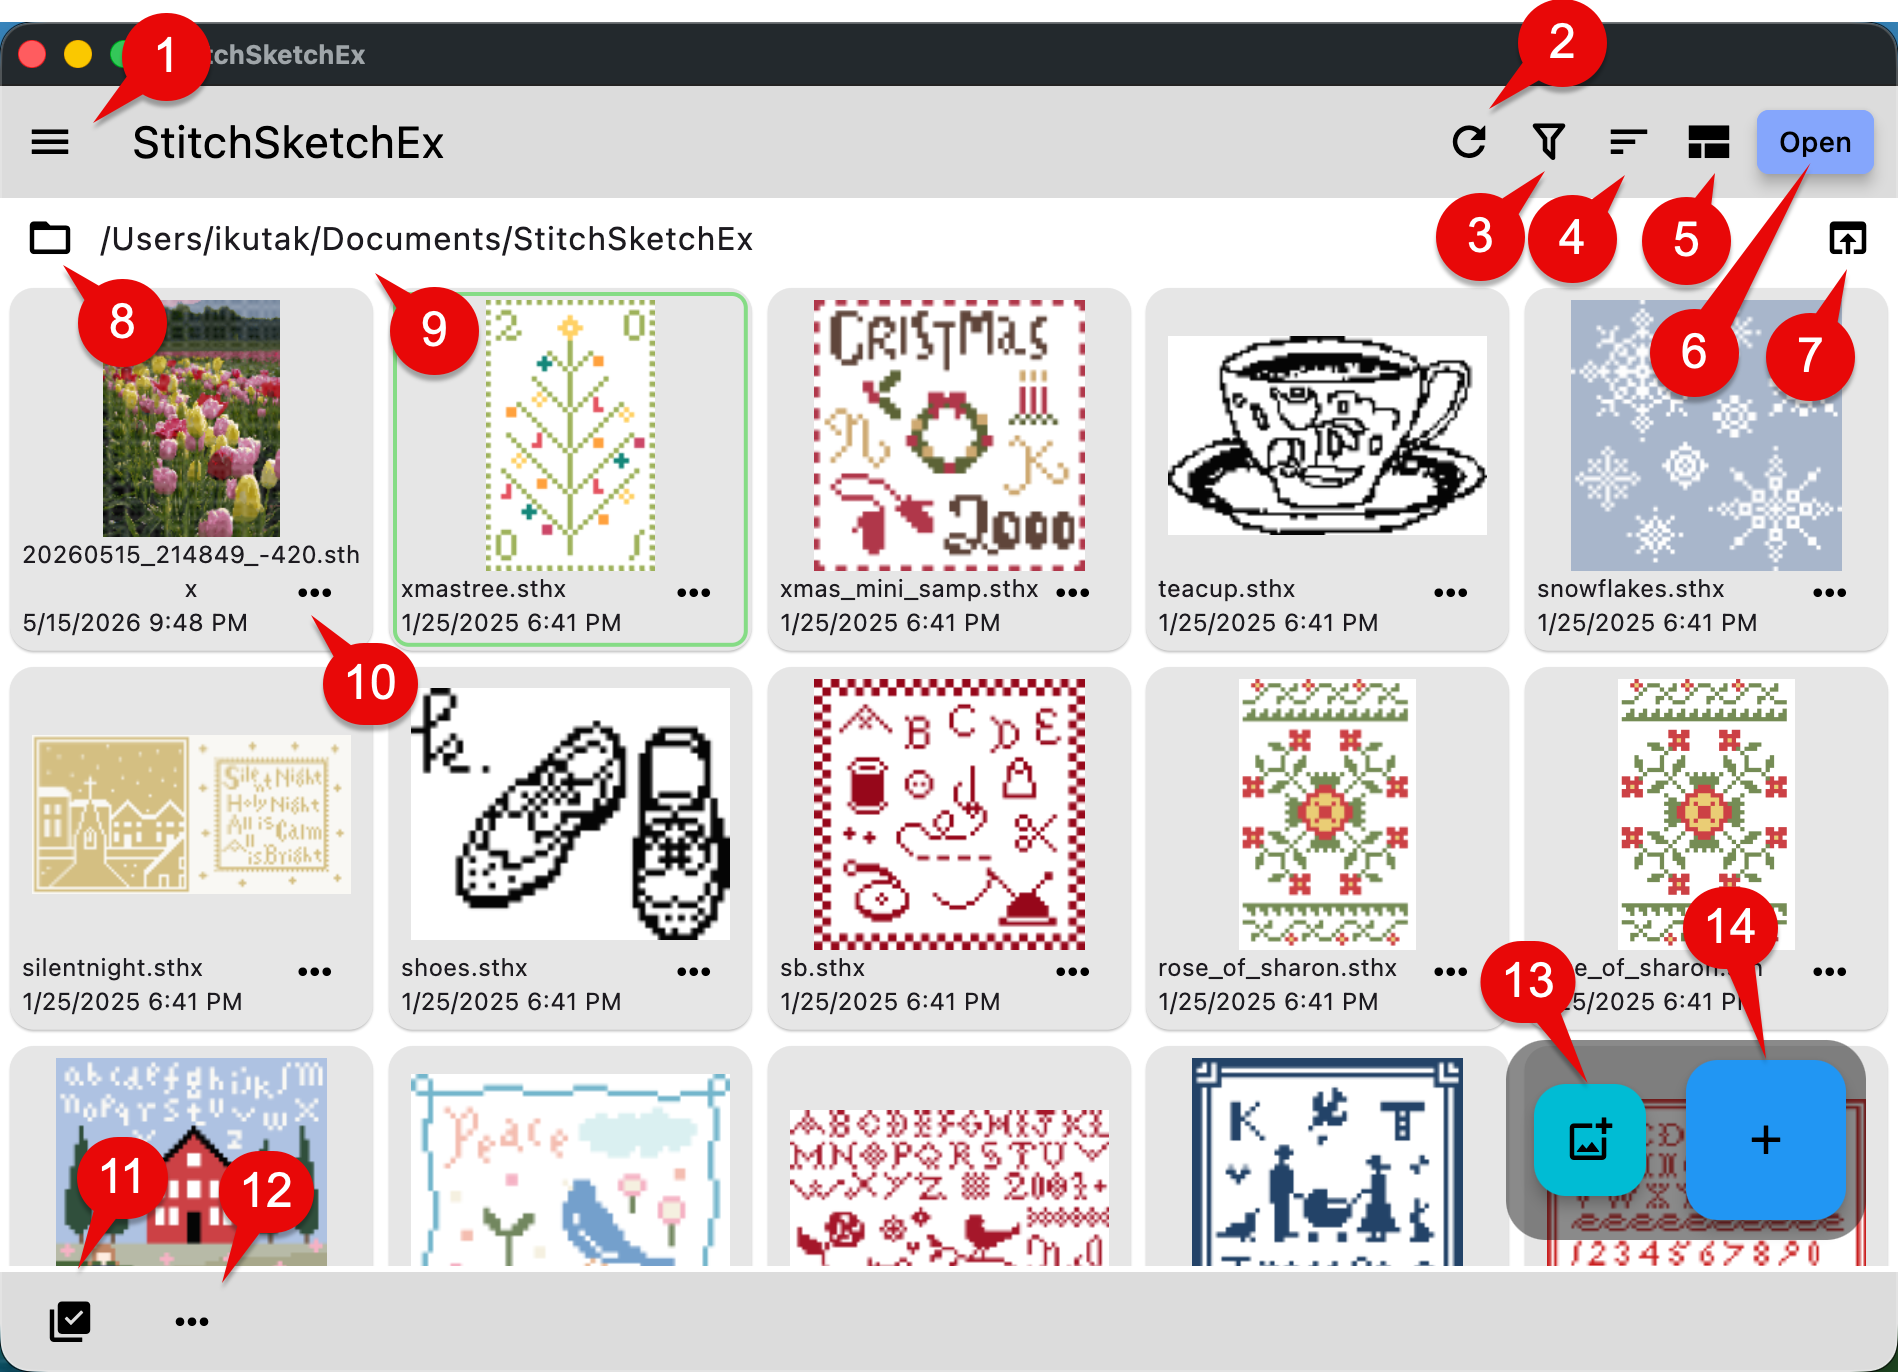
The file manager is the very first screen you see when the app is launched.
Use it to manage all the charts you create.
-
Application menu (See below)
-
Reload
Reload (Refresh) the list. When you manually copy a file into the workspace folder, use this button to refresh the list. -
Filter Filter the files:
- Chart files
- Archives (.zip) files
- All files
- Deleted files
-
Sort
Sort by file name or last modified -
List/Grid View switch
-
Select a file, then click “Open” to open the chart
-
Open the workspace folder
-
Select the workspace folder
macOS: Because of macOS security rules, you need to select a folder that the app can access. -
Current workspace folder path
-
A popup menu for a file (See below)
-
Selection mode: Single or Multiple
-
File operation menu (See below)
-
Convert an image to a chart button
-
Create a new chart button
File operation menu
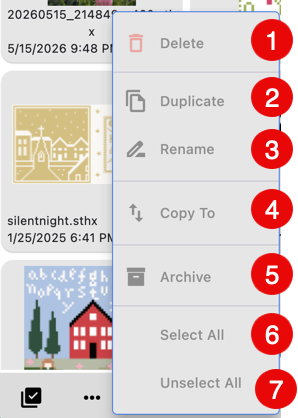
Some menu items are enabled/disabled based on the single or multiple selection mode.
-
Delete the file Once a file is deleted, it is marked as “deleted”. You can show deleted files by selecting “Deleted” from the filter.
-
Duplicate Copy the file and create a new file with a different name.
-
Rename Show a dialog box for renaming the file.
-
(Desktop only) Copy the file to a folder. A system file dialog appears so you can select the target folder and file name.
-
Archive the file (create a zip file)
-
Select all files (only in “Multiple” mode)
-
Unselect all files (only in “Multiple” mode)
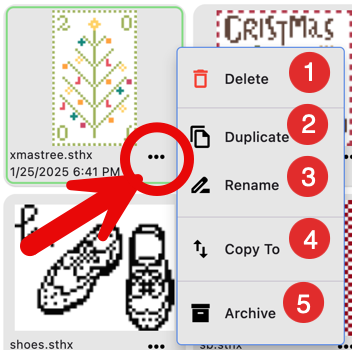
Single Card File Operation popup menu
Click the ”…” button in the chart tile to show a popup menu with the following operations:
-
Delete the file Once a file is deleted, it is marked as “deleted”. You can show deleted files by selecting “Deleted” from the filter.
-
Duplicate Copy the file and create a new file with a different name.
-
Rename Show a dialog box for renaming the file.
-
(Desktop only) Copy the file to a folder. A system file dialog appears so you can select the target folder and file name.
-
Archive the file (create a zip file)
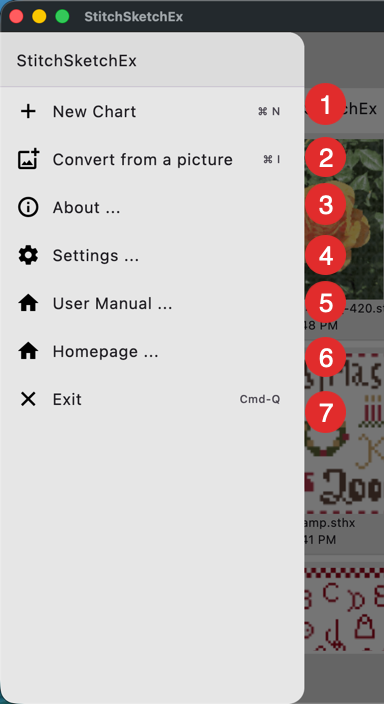
Application menu
-
Create a new chart. This is the same as clicking the ”+” icon button at the bottom right.
-
Convert a picture into a chart This is the same as clicking the “picture” icon button at the bottom right.
-
About StitchSketchEx - show an About dialog box
-
Settings - open the user preferences page
-
Open the StitchSketchEx user manual in a browser
-
Open the StitchSketchEx homepage in a browser
-
Exit StitchSketchEx (close the application)