StitchSketchEx User Manual
How to select
For the Rectangle and Ellipse selectors
- Click the starting point, hold the mouse button down, move the cursor to the end point, and release the button to end the frame.
(On mobile device: Touch-Drag-Release) - A “selection frame” appears. You can adjust the frame using the anchors (small boxes).
- Click outside the frame to confirm the selection area.
Or, click the “Confirm” button. See #3 below.
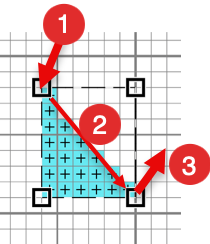
- Once confirmed, the selection becomes an animated dotted box.
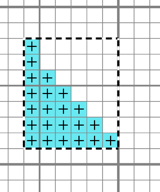
Selected Area:
For Pixel Selector
Click and move. This works like pixel drawing, except it selects cells.
For Magic Wand
Click any pixel to select connected pixels with the same color.
Pasted frame
There is another frame that looks similar to a “selection frame” but behaves differently.
It is called a “pasted frame”.
 You can drag this frame, stamp it, or confirm/cancel the pasting operation.
See “Move Mode” below.
You can drag this frame, stamp it, or confirm/cancel the pasting operation.
See “Move Mode” below.
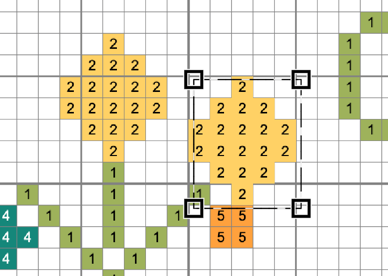
Cell Selection Tool
Use this tool to select cells.
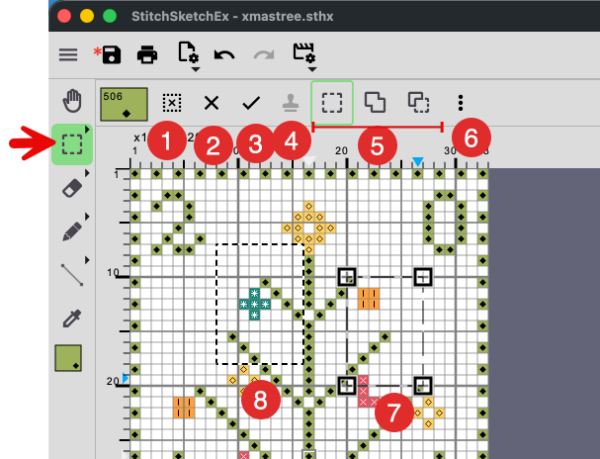
- Deselect the selection (selected area)
- Cancel the selection (for selection frame or pasted frame)
- Confirm the selection (for selection frame or pasted frame)
- Stamp Draw the pasted frame.
- Selection Mode:
- Single selection: each selection action deselects the existing selection.
- Union: a new selection is added to the existing selection.
- Exclude: a new selection is removed from the existing selection.
- Selection Operation Menu (See below)
Selection Operation Menu
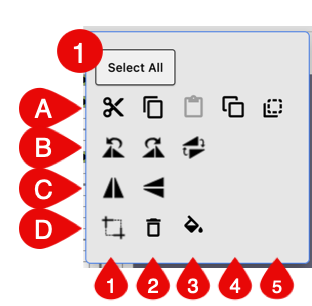
Special command:
- Select All: Select the entire chart.
For a selected area, you can use these operations:
For each row, from left to right (1,2,3…)
A:
- Cut
- Copy
- Paste After pasting, the selection enters “Move Mode” (see below).
- Move the copy: Copy the selection and enter “Move Mode” (see below).
- Move: Cut the selection and enter “Move Mode” (see below).
B:
- Rotate left 90 degree
- Rotate right 90 degree
- Rotate 180 degree
C:
- Flip Horizontal
- Flip Vertical
D:
- Crop to the selection
- Delete (Erase) the selected area
- Fill the selected area with current drawing color
Move Mode (Pasted Frame)
The following actions place data in a frame that you can move before confirming it:
- Paste
- Move the copy
- Move
After one of these actions, a frame appears around the data. This is the “pasted frame”. While moving it, you can use the “Stamp” button to draw the moving data onto the chart.
Selecting
This appears during a selection operation.
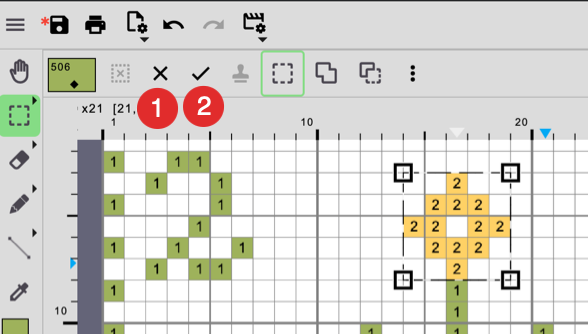
- Cancel selecting operation
- Confirm the selection operation
This is the same as clicking outside the selection frame.
Selected
After the selection is confirmed:
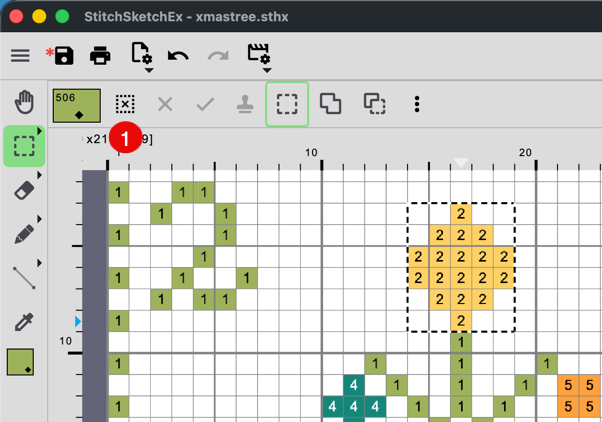
- Unselect
Moving
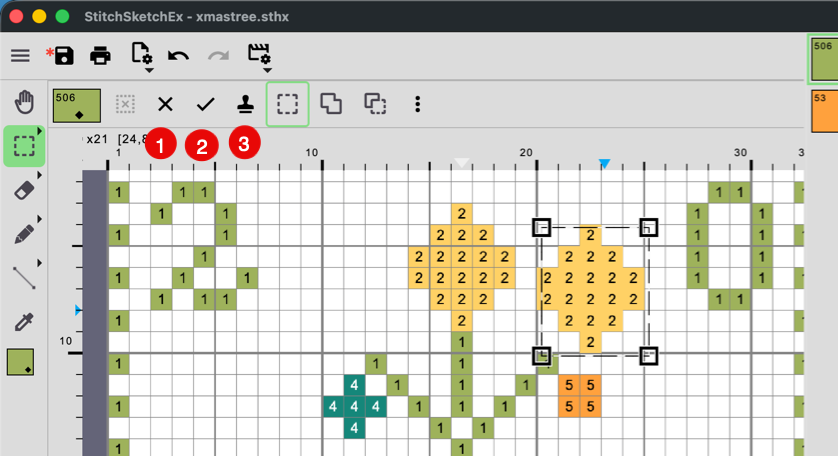 In Moving mode:
- Cancel moving
- Confirm the move and place the moving frame on the chart.
- Stamp the moving frame on the chart and keep moving it.
This is useful when you want to repeat the same pattern.